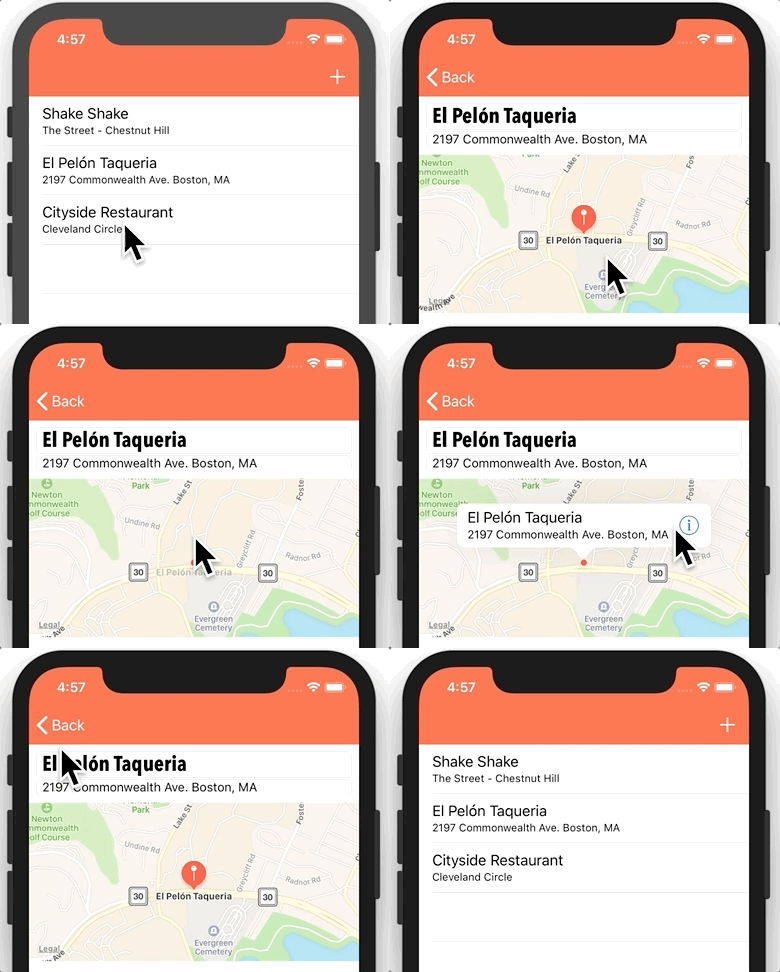
Learning Objectives
-
Include a map view in your app
-
Zoom and center the map on a particular coordinate and map scale
-
Create an annotation, which holds map data
-
Create an annotation view, which shows a marker on the map at a given annotation’s coordinate data
-
Display a callout when an annotation view is selected and customize the callout with a right detail disclosure button.
Video Lesson
Reference
Understanding MapKit
MapKit is Apples framework for displaying and customizing maps. Add an import MapKit statement at the top of any swift code that will use MapKit.
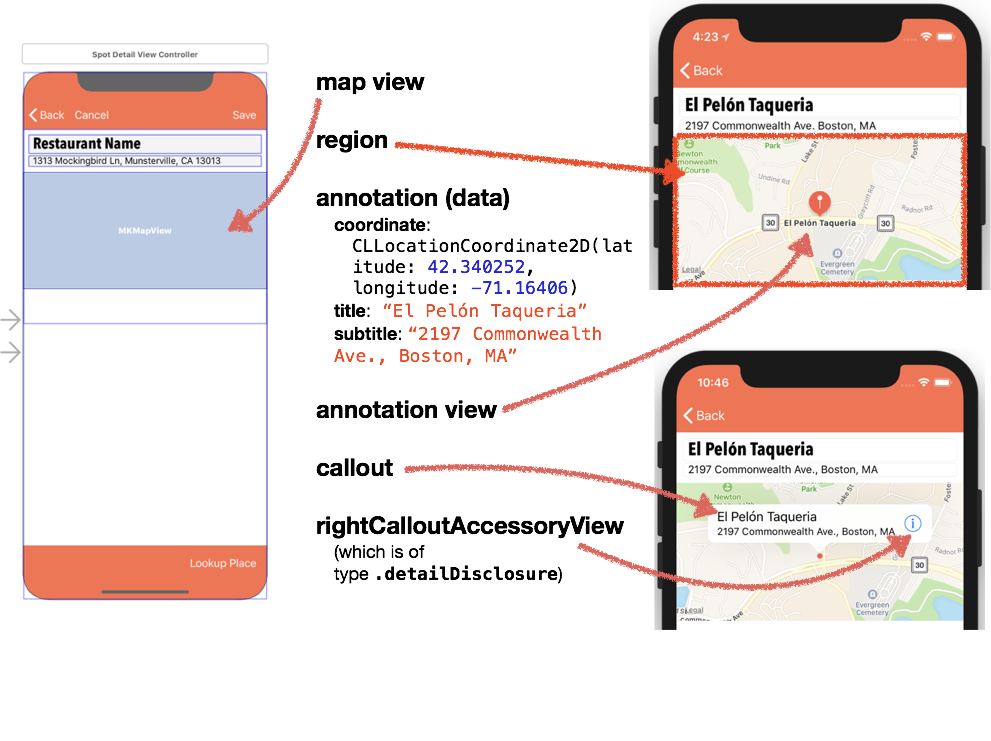
A map view is an interface object of class type MKMapView that will hold a map. You can add a map view to your app by dragging it from the object library onto a view controller.
A region is an object of type MKCoordinateRegion that defines the center point of a map as well as its zoom level. We defined our region using MKCoordinateRegionMakeWithDistance and passing in a center coordinate (of type CLLocationCoordinate2D) and a distance representing latitudinalMeters (east-west) and longitudinalMeters (north-south) area that should be shown on the map. These distances are of type CLLocationDistance, which is just an alias for Double.
An annotation (an object of type MKAnnotation) is the data associated with a point on the map. Any annotation must have a property named coordinate of type CLLocationCoordinate2D, and can optionally have a title and subtitle property of type String? Any class that adheres to the NSObject and MKAnnotation protocols can serve as an annotation.
An annotation view is the marker you see indicating a point on a map view. Annotation views are of type MKAnnotationView, and can be MKMarkerAnnotationViews (the balloon icon), MKPinAnnotationView (pins), or even custom annotation views.
“Useful Questions” Answered for working with a Map View
-
Do we need to import new frameworks?
-
Yes – import MapKit
-
-
Declare protocols?
-
Yes – MKMapViewDelegate
-
-
Do we need to set a delegate and/or dataSource?
-
Yes – a delegate for our map view object, usually established using mapView.delegate = self
-
-
Any required methods?
-
Not exactly required, but we’ll almost always use mapView(: viewFor) since it’s used to configure an annotation view.
-
-
Anything else?
-
Don’t forget to create an @IBOutlet for the map view (usually named mapView).
-
Any class used as an annotation should conform to NSObject and MKAnnotation, It should have a coordinateproperty (of type CLLocationCoordinate2D) and can optionally have String? properties named title and subtitle.
-
Swift code for our MKMapViewDelegate extension
The mapView function viewFor works much like the tableView’s cellForRowAt function, either dequeuing an existing annotation view for reuse, or creating and configuring a new annotation view.
When using this function, first check to make sure you are working with an annotation that you want to configure (see the guardstatement below, which verifies any annotation we configure is of type Spot). This is important because we may have apps with multiple annotations, such as when iOS includes a pulsing blue marker to show the user’s location.
Key Takeaway
-
MapKit is Apple’s framework for working with maps.
-
A map view is an interface object that allows you to add maps to your apps.
-
A region specifies the center and size of a map shown in a map view.
-
An annotation contains data displayed as a point on a map.
-
An annotation view is the marker corresponding to an annotation.
-
The mapView function viewFor works much like the tableView’s cellForRowAt function, either dequeuing an existing annotation view for reuse, or creating and configuring a new annotation view.
Exercises
-
Make a copy of Snacktacular that you can modify without disturbing the original that you’ll continue to use in our lessons. In this new copy, modify the mapView(_ :viewFor) method to display annotation views of type pin instead of type marker. This is easy to do. Simply change any MKMarkerAnnotationView reference to MKPinAnnotationView. The pin annotation will not show title or detail until it has been selected. See the image below to compare how your app should look when using pin annotations vs. marker annotations.


